How to Knit for Beginners: The Complete Step-by-Step Guide
By the Knitting Mastery team11 min read
In short
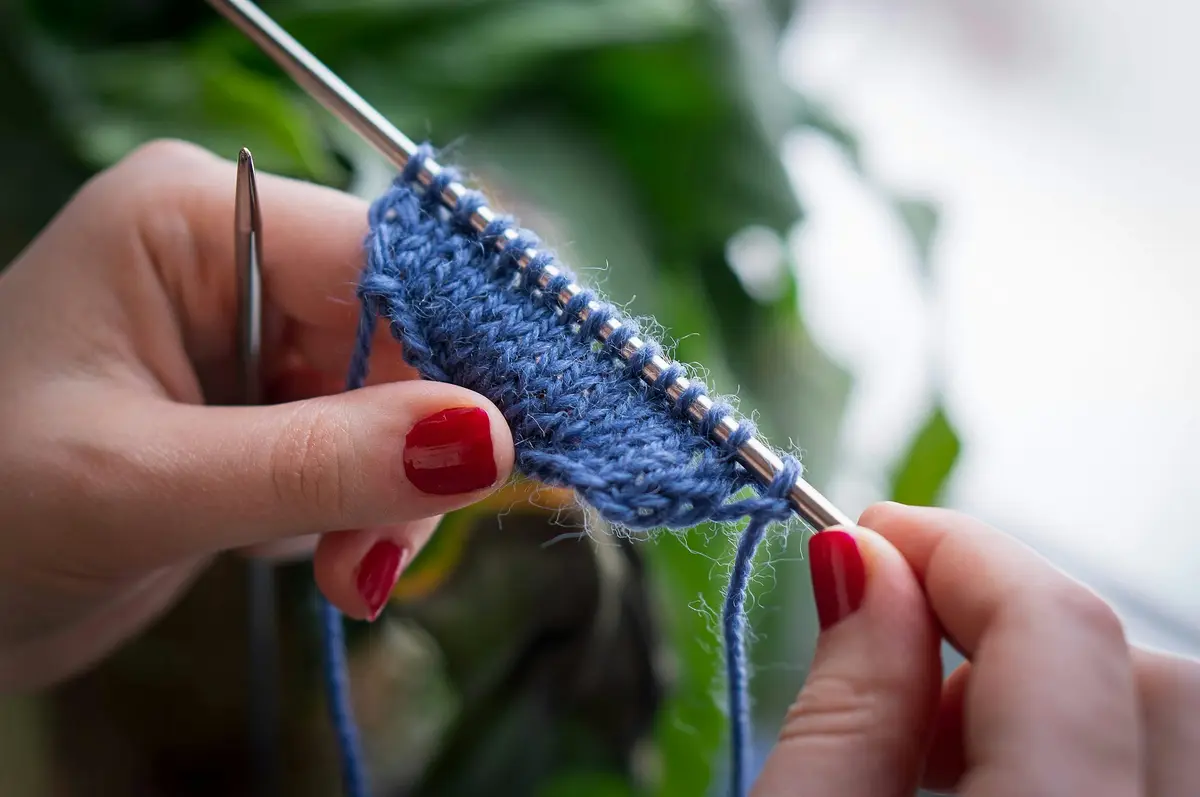
To start knitting, you need one pair of medium-sized needles, a smooth, light-colored, medium-weight yarn, scissors and a tapestry needle. Then you learn four moves: casting on to put stitches on the needle, the knit stitch, the purl stitch, and binding off to finish the edge. Practice them on a small square called a swatch before starting a simple first project such as a scarf.
Every knitted piece, from a dishcloth to a sweater, is made with the same four moves: casting on, the knit stitch, the purl stitch and binding off. This guide takes you through them in the order you will learn them, starting with what to buy and how to hold your tools. Each move has its own detailed tutorial, linked below, for when you sit down to practice it.
What you need to start knitting
You need only four things to begin:
- One pair of knitting needles around US 8 (5 mm). Straight needles about 10 to 14 inches (25 to 35 cm) long are the easiest to handle at first.
- One ball of smooth, light-colored, medium-weight yarn. This kind of yarn makes learning much easier; the reasons are explained below.
- A small pair of scissors for cutting the yarn.
- A tapestry needle: a large, blunt sewing needle with an eye big enough for yarn. You use it at the end to weave the loose ends into your work.
A few extras make life easier but can wait: stitch markers (small rings that sit on the needle to mark a spot), a row counter, and a medium-sized crochet hook for rescuing dropped stitches.
How to choose your first yarn
Look for three qualities:
- A light color. Cream, pale yellow, light blue or light gray let you see each stitch clearly. Dark yarn hides the shape of the loops, which makes mistakes hard to spot.
- A smooth texture. A smooth yarn shows every stitch and slides easily along the needle. Avoid fluffy, hairy or "novelty" yarns with bumps, loops or fringes until you feel confident.
- A medium weight. The thickness of a yarn is called its weight. Medium-weight yarn, often labeled "worsted" or "aran" or marked with the number 4 in the weight symbol, is thick enough to see and handle comfortably, yet thin enough to knit at a steady pace.
Wool or a wool blend is forgiving, because it stretches a little and springs back. Acrylic is also a good, easy-care choice. Pure cotton has very little stretch, which makes even stitches harder to achieve at first. For more on fibers and how to read a yarn label, see our guide to the best yarn for beginners.
How to choose your first needles
The yarn label (the paper band around the ball) suggests a needle size. For medium-weight yarn it is usually between US 7 and US 9 (4.5 and 5.5 mm), so US 8 (5 mm) is a safe middle choice.
The material matters too. Wood or bamboo needles have a slight grip, so stitches are less likely to slide off by accident. Metal needles are smooth and fast, which is pleasant once your hands are confident, but slippery while you are learning.
Needle sizes are numbered differently in the US, the UK and metric countries. Our guide to knitting needle sizes explains how the systems compare.
Knitting terms to know before you start
You will meet these words in every tutorial and pattern:
| Term | What it means |
|---|---|
| Working yarn | The strand attached to the ball, which you knit with |
| Tail | The loose end of the yarn, not attached to the ball |
| Stitch | One loop of yarn on the needle |
| Row | One pass of stitches from one needle to the other |
| Left needle | The needle holding the stitches waiting to be worked |
| Right needle | The needle that receives the new stitches |
| Right side (RS) | The side of the work that will show on the finished piece |
| Wrong side (WS) | The back, or inside, of the work |
How to hold knitting needles and yarn
There are two main ways to knit, and both make exactly the same stitches:
- English style, also called "throwing": the working yarn is held in your right hand, and you wrap it around the needle with your right index finger.
- Continental style, also called "picking": the working yarn is held in your left hand, and the right needle catches it.
This guide and our beginner tutorials teach English style. Neither style is more correct; if you already crochet, you may enjoy trying continental style later, because the yarn sits in the same hand as in crochet.
Holding the needles
- Hold the needle carrying the stitches in your left hand, from above, with your fingers resting lightly on it just below the stitches.
- Hold the empty needle in your right hand the same way, or like a pencil, whichever feels steadier.
- Relax your shoulders and rest your elbows. The needles should feel held, not gripped.
Holding the yarn
The working yarn needs a little resistance as it runs through your fingers, so that your stitches all come out the same size. Knitters call this resistance tension. One simple way to hold the yarn:
- Lay the working yarn over your right index finger, so it runs from the needle across that finger.
- Pass it under your middle and ring fingers.
- Wrap it once, loosely, around your little finger.
The yarn should glide through your hand when you pull it, without jerking or sticking. If this hold feels awkward, try simply closing your hand loosely around the yarn. There is no single right way, only a way that lets the yarn flow evenly.
The four essential knitting moves
1. Cast on: put the first stitches on the needle
Casting on makes the first row of loops that your knitting grows from. We recommend the long-tail cast-on: it uses one needle, gives a neat, slightly stretchy edge and suits most beginner projects. In outline:
- Measure a tail of yarn long enough for all your stitches.
- Make a slip knot on the needle; it counts as your first stitch.
- Hold the tail over your left thumb and the working yarn over your left index finger, in a "slingshot" shape.
- Scoop up a loop from each strand with the needle to make each new stitch.
For full instructions, including how to measure the tail, see how to cast on with the long-tail method.
2. The knit stitch
The knit stitch is the foundation of almost everything you will make. With the working yarn at the back of the work (the side facing away from you):
- Insert the right needle into the front of the first stitch on the left needle, from left to right.
- Wrap the working yarn counter-clockwise around the right needle.
- Pull the new loop through the stitch toward you.
- Slip the old stitch off the left needle.
For the detailed tutorial, see how to knit the knit stitch.
3. The purl stitch
The purl stitch is the mirror image of the knit stitch: the same stitch, seen from the other side. With the working yarn at the front of the work:
- Insert the right needle into the front of the first stitch, from right to left.
- Wrap the working yarn counter-clockwise around the right needle.
- Push the new loop backward through the stitch, away from you.
- Slip the old stitch off the left needle.
For the detailed tutorial, see how to purl.
4. Bind off: finish the edge
Binding off (called "casting off" in British patterns) locks the last row so the stitches cannot unravel, and makes a neat top edge.
- Knit two stitches.
- Lift the first stitch over the second and off the right needle.
- Knit one more stitch and lift again, repeating to the end of the row.
- Cut the yarn and pull the end through the last loop.
For the detailed tutorial, see how to bind off.
Garter stitch vs stockinette stitch
Combine the knit and purl stitches in different ways and you get different fabrics. These are the first two you will make:
| Garter stitch | Stockinette stitch | |
|---|---|---|
| How to make it | Knit every row | Knit one row, purl one row, and repeat |
| What it looks like | Horizontal ridges on both sides | Smooth V shapes on the front, bumps on the back |
| How it behaves | Lies flat; thick and squishy | Smooth and thinner; the edges curl |
| Good for | First scarves, dishcloths, borders | Sweaters, hats and most patterns |
Garter stitch needs only the knit stitch, which is why it is the classic first fabric. Stockinette stitch (called "stocking stitch" in the UK) is the smooth fabric you see on most sweaters. It needs both stitches, and its natural curl is usually controlled with a border of garter stitch or ribbing.
How to practice with a swatch
A swatch is a small square of knitting made for practice or testing. It is the best place to make mistakes: nothing is at stake, and you can always unravel it and reuse the yarn.
- Cast on 20 stitches.
- Knit every row until the piece measures about 2 inches (5 cm). This is garter stitch.
- Count your stitches at the end of every row. You should always have 20.
- Switch to stockinette stitch: knit one row, then purl one row, and repeat for another 2 inches (5 cm).
- Bind off.
- Study your square. Find the ridges, the Vs and the bumps, and look for any stitch that looks different from its neighbors.
Easy first knitting projects
Once your swatch looks reasonably even, choose a first project that is flat, rectangular and worked in garter stitch:
- A scarf: the classic first project, with plenty of knit-stitch practice and no shaping.
- A dishcloth or washcloth: small and quick, so you finish something soon. Dishcloths are usually knitted in cotton, which has little stretch, so take your time with tension.
- A headband: a long strip with its two ends sewn together.
- Blanket squares: each one is a swatch with a purpose, to be sewn together later.
For more ideas, in a sensible order, see easy knitting projects for beginners.
Common beginner problems and how to fix them
Your stitches are too tight
If you struggle to push the needle into your stitches, they are too tight. The usual causes are forming each stitch on the narrow tip of the needle and holding the yarn too firmly.
- Push each new stitch onto the full-width part of the right needle before you move on. A stitch takes the size of the part of the needle it is formed on.
- Loosen your grip so the yarn glides through your fingers.
- Do not tug the yarn after every stitch; a gentle pull is enough.
- If only the cast-on row is tight, cast on over a needle one or two sizes larger.
Extra stitches keep appearing
If you started with 20 stitches and now have 22, one of these is the usual cause:
- At the start of a row, the working yarn was pulled up and over the needle, so the first stitch showed two loops and you knitted both. Let the yarn hang straight down from the first stitch instead.
- Between a knit and a purl stitch, the yarn was moved over the right needle instead of between the two needle tips, which adds a loop.
- A strand between two stitches, or a split stitch, was worked as if it were a stitch.
Count your stitches at the end of every row so you catch the problem early. To go back, you can undo stitches one at a time; our knit stitch tutorial explains how.
You dropped a stitch
A dropped stitch is a loop that has slipped off the needle without being worked. Left alone, it unravels down the rows and leaves a vertical ladder. Do not pull on the work. Slip a safety pin or a locking stitch marker through the loose loop so it cannot run further, then follow our guide to fixing a dropped stitch, which shows how to pick it back up with a crochet hook.
You lost your place
- Finish the row before you put your knitting down whenever you can.
- Keep a record. Use a row counter, or make a tally mark on paper at the end of each row.
- Mark the right side with a locking stitch marker or a safety pin clipped to the fabric, so you always know which side is facing you.
- Read your knitting. In garter stitch, each ridge equals two rows. In stockinette stitch, the side covered in Vs is the knit side.
What to learn next
Once you can cast on, knit, purl and bind off, you have the whole foundation of knitting. The next skill is reading a knitting pattern: the abbreviations and conventions that let you follow any design. After that come increases and decreases, the techniques that add and remove stitches to shape your knitting.
When you are ready for a structured path, start here suggests an order to learn in, and the library gathers our books and video courses.
Frequently asked questions
Can you teach yourself to knit?
Yes. Knitting is built from a small number of moves repeated row after row, and you can learn them at home with clear written steps and a practice swatch. Go slowly, count your stitches at the end of each row, and expect your first rows to look uneven.
What size needles and yarn should a beginner use?
A smooth, light-colored, medium-weight yarn (often labeled worsted or aran, weight number 4) with needles around US 8 (5 mm) is a comfortable starting point. The yarn label also suggests a needle size for that yarn.
Should I learn English or continental knitting?
Either is fine, and both make exactly the same stitches. In English style the right hand wraps the yarn around the needle; in continental style the left hand holds the yarn. This guide teaches English style. If you already crochet, continental may feel natural later, because the yarn sits in the same hand.
What is the easiest thing to knit first?
A garter-stitch scarf or a dishcloth. Both are flat rectangles worked with the knit stitch only and no shaping, so you can concentrate on making even stitches.
What is the difference between garter stitch and stockinette stitch?
Garter stitch is made by knitting every row; it shows ridges on both sides and lies flat. Stockinette stitch alternates one knit row and one purl row; it has smooth V shapes on the front, bumps on the back, and edges that tend to curl.
Keep learning
Beginner basics
How to Cast On: The Long-Tail Method, Step by Step
Learn the long-tail cast-on step by step: how long to make the tail, the slip knot, the slingshot hold, and how to fix a cast-on edge that is too tight.
Beginner basics
How to Knit: The Knit Stitch Step by Step
Learn the knit stitch step by step, English style: insert, wrap, pull through and slip off. Then turn your work, read your stitches and fix common mistakes.
Yarn & tools
The Best Yarn for Beginners (and What to Avoid)
The best yarn for beginners is smooth, medium-weight wool or acrylic in a light color. Learn to read a yarn label, match dye lots and know what to avoid.